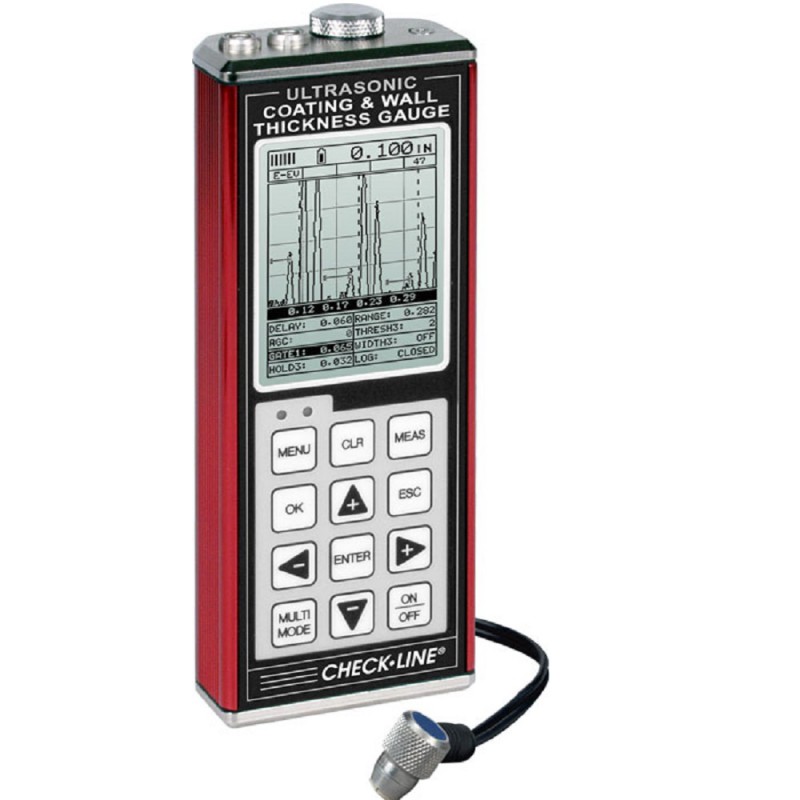
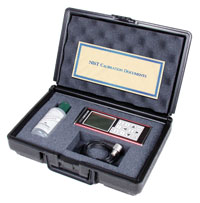
TI-CMXDLP Ultrasonic Thickness Gauge
Advanced Technology in Two Versions
Explore the TI-CMXDLP options from Checkline, available in black & white (TI-CMXDLP) and colour (TI-CMXDLP-C) models. These high-end devices in the CMX series offer rapid and accurate measurements of both coating and wall thickness from a single side.
Key Features:
- Available Versions: Choose between the standard black & white model or the colour model for enhanced display.
- Advanced Measurement Modes: Including Pulse-Echo and Echo-Echo, tailored for measurements with or without coating.
Special Features:
- Large LCD Display: Both versions feature a backlit LCD that displays detailed measurement information.
- E-EV Mode (Echo-Echo-Verify): Ensures the accuracy of measurements with additional verifications through subsequent echoes.
User Benefits:
- Intuitive and Versatile Interface: Both models offer easy-to-use interfaces and are suitable for demanding industrial applications.
- Advanced Data Storage: Capacity to store thousands of entries and ease of data transfer via USB.
The TI-CMXDLP is perfect for professionals who require a robust and reliable gauge, capable of performing precise measurements across a variety of materials and conditions. This gauge not only offers cutting-edge technology but also the flexibility to choose between black & white or colour displays based on the user's needs.
Features
- Wide variety of dual-element probes can be used for nearly any application.
- Bar graph with user-set start end values providing highest resolution around the target thickness value.
- Auto probe recognition with Auto Zero or Manual Zero.
- Adjustable Gain in 5 steps (VLow, Low, Med, Hi & VHi) in 2db increments providing a 8 db gain adjust range (42–50 db).
- Includes NIST-Traceable Calibration.
- 64 custom setups can be stored and retrieved for convenient use and labeled for easy identification
- Differential Mode allows user to set a "target thickness value" and display will show the DIFFERENCE between actual and target thickness as a plus or minus value.
- Display Hi/Lo Alarm Limits with audible and visual indicators.
- Metal housing provides strong protection against harsh environments.
- Measures Coatings up to 0.100"
- CE Certified.
- 2 Year Warranty
- T-8071-0868 Probe to 1"-1MHz Single-Element Membrane Probe to measure Blow Holes in Thick PE Pipes and Fittings
- Built-in memory with RS-232 output for transferring data to a Printer or PC
- Includes Datacomm Data Transfer & Analysis Software and RS-232 Cable, FREE
- Data Files can be user-set for a "grid type" structure where data is formatted in Rows & Columns or a "sequential" file where all data appears in a single column
- Each "grid type" File can be set for up to 999 rows by 52 columns
- Each "sequential" File can be set for up to 512 rows by 1 column
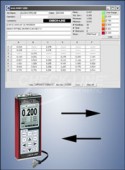
- Each File can be set for "data only" or as "data plus B-scan Graphic". Memory Capacity is over 225,000 data values or over 16,000 data values with B-scan
| Hi-Speed Scan Mode | B-Scan Mode |
 |
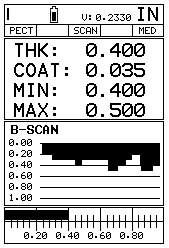 |
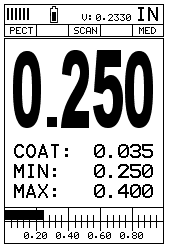
| Scan Mode measures 64 times per second, displaying the max and min reading measured during the scan interval. Sample rate is 200/sec when coating measurement is off. | The B-Scan displays a time based cross section view of test material of the contour of the blind, or underside of a pipe or tank application. the B-Scan view draws at a rate of seven seconds per screen from right to left. |
| Model | CMX | CMX-DL | CMX DLP | CMX-DLP-C |
|---|---|---|---|---|
| Display Mode | ||||
| Material thickness digits display | Yes | Yes | Yes | Yes |
| B-Scan cross sectional display | Yes | Yes | Yes | Yes |
| Combined B-Scan and digits display | Yes | Yes | Yes | Yes |
| Coating Thickness Display | Yes | Yes | Yes | Yes |
| Scan Bar Display | Yes | Yes | Yes | Yes |
| A-Scan Display | - | - | - | + Rectified, - Rectified, Full Waveform (RF) Portrait & landscape views |
| Measurement Range | PE: 0.63 - 1219.2mm (0.025 - 48”) PETP: 0.63 - 1219.2mm (0.025 - 48”) EE: 2.54 - 152.4mm (0.100 - 6.0“) EEV: 1.27 - 25.4mm (0.050 - 1.0”) CT: 0.01 - 2.54mm (0.0005 - 0.100”) PECT: 0.63 - 1219.2mm (0.025 - 48”) PECT: 0.01 - 2.54mm (0.001 - 0.100") | PE: 0.63 - 1219.2mm (0.025 - 48”) PETP: 0.63 - 1219.2mm (0.025 - 48”) EE: 2.54 - 152.4mm (0.100 - 6.0“) EEV: 1.27 - 25.4mm (0.050 - 1.0”) CT: 0.01 - 2.54mm (0.0005 - 0.100”) PECT: 0.63 - 1219.2mm (0.025 - 48”) PECT: 0.01 - 2.54mm (0.001 - 0.100") | PE: 0.63 - 1219.2mm (0.025 - 48”) PETP: 0.63 - 1219.2mm (0.025 - 48”) EE: 2.54 - 152.4mm (0.100 - 6.0“) EEV: 1.27 - 25.4mm (0.050 - 1.0”) CT: 0.01 - 2.54mm (0.0005 - 0.100”) PECT: 0.63 - 1219.2mm (0.025 - 48”) PECT: 0.01 - 2.54mm (0.001 - 0.100") | PE: 0.63 - 1219.2mm (0.025 - 48”) PETP: 0.63 - 1219.2mm (0.025 - 48”) EE: 2.54 - 152.4mm (0.100 - 6.0“) EEV: 1.27 - 25.4mm (0.050 - 1.0”) CT: 0.01 - 2.54mm (0.0005 - 0.100”) PECT: 0.63 - 1219.2mm (0.025 - 48”) PECT: 0.01 - 2.54mm (0.001 - 0.100") |
| Measurement Rate | ||||
| Manual | 8 readings per second | 8 readings per second | 8 readings per second | 8 readings per second |
| Scan Mode | 250 readings per second | 250 readings per second | 50 readings per second | 50 readings per second |
| Scan bar display | 10 readings per second | 10 readings per second | 10 readings per second | 10 readings per second |
| Measurement Resolution | 0.01mm (0.001”) | 0.01mm (0.001”) | 0.01mm (0.001”), 0.001mm (0.0001”) selectable | 0.01mm (0.001”), 0.001mm (0.0001”) selectable |
| Velocity Calibration Range | 309.88 - 18,542m/s (0.0122 - 0.7300in/µs) | 309.88 - 18,542m/s (0.0122 - 0.7300in/µs) | 309.88 - 18,542m/s (0.0122 - 0.7300in/µs) | 309.88 - 18,542m/s (0.0122 - 0.7300in/µs) |
| Additional Features | ||||
| High Speed Scan Mode | - | - | - | Yes |
| Differential Mode | - | - | - | Yes |
| Limit alarm mode | - | - | - | Yes |
| B-Scan DisplCalibration Optionsay Speed | 15 readings per second | 15 readings per second | 15 readings per second | 10 to 200 readings per second |
| Flaw Mode | - | - | Basic prove-up flaw detection using single element angle beam transducers- | Basic prove-up flaw detection using single element angle beam transducers |
| Calibration Setups | - | - | - | 64 user-definable setups transferable to and from a PC archive |
| Gates | - | - | 3 fully adjustable gates: start, stop, width & threshold | 3 fully adjustable gates: start, stop, width & threshold |
| Damping | - | - | Adjustable damping (50 - 1500ohms) | Adjustable damping (50 - 1500ohms) |
| Pulser Type | Dual square wave pulsers Pulse repetition frequency up to 250Hz | Dual square wave pulsers Pulse repetition frequency up to 250Hz | Dual square wave pulsers Pulse repetition frequency up to 250Hz | Dual square wave pulsers Pulse repetition frequency up to 250Hz |
| Gain | Manual or automatic gain control (AGC) with 110dB range (limited) | Manual or automatic gain control (AGC) with 110dB range (limited) | Manual, automatic gain control (AGC) with 110dB range (limited), Linear time dependent gain (TDG) with adjustable slope | Manual, automatic gain control (AGC) with 110dB range (limited), Linear time dependent gain (TDG) with adjustable slope |
| Timing | Precision temperature controlled crystal oscillator (TCXO) timing with single shot 100MHz 8bit ultra-low power digitizer | Precision temperature controlled crystal oscillator (TCXO) timing with single shot 100MHz 8bit ultra-low power digitizer | Precision temperature controlled crystal oscillator (TCXO) timing with single shot 100MHz 8bit ultra-low power digitizer | Precision temperature controlled crystal oscillator (TCXO) timing with single shot 100MHz 8bit ultra-low power digitizer |
| Memory and Data Logging | • 4GB internal memory • Sequential and grid logging • Alpha numeric batch identification • OBSTRUCT indicates inaccessible locations • Bitmap graphic capture and capture viewer | • 4GB internal memory • Sequential and grid logging • Alpha numeric batch identification • OBSTRUCT indicates inaccessible locations • Bitmap graphic capture and capture viewer | • 4GB internal memory • Sequential and grid logging • Alpha numeric batch identification • OBSTRUCT indicates inaccessible locations • Bitmap graphic capture and capture viewer | • 4GB internal memory • Sequential and grid logging • Alpha numeric batch identification • OBSTRUCT indicates inaccessible locations • Bitmap graphic capture and capture viewer |
| Calibration Options | ||||
| 1 - point | Yes | Yes | Yes | Yes |
| 2 - point | Yes | Yes | Yes | Yes |
| Material selection | Yes | Yes | Yes | Yes |
| Velocity (speed of sound) | Yes | Yes | Yes | Yes |
| Transducer Probe Type | Dual element | Dual element | Dual element | Dual Element, Single Element (1 - 20Mhz), Contact, Matching Layer, Delay Line and Pencil |
| Transducer Frequency Range | 1 - 10MHz | 1 - 10MHz | 1 - 10MHz | 1 - 20MHz |
| Transducer Recognition | Automatic & manual - selectable from a list | Automatic & manual - selectable from a list | Automatic & manual - selectable from a list | Automatic & manual - selectable from a list |
| V-path / dual path error correction | Automatic | Automatic | Automatic | Automatic |
| Probe Zero | Automatic & manual (via integrated probe disk) | Automatic & manual (via integrated probe disk) | Automatic & manual (via integrated probe disk) | Automatic & manual (via integrated probe disk) |
| Display | 1/8 VGA (greyscale) 62 x 45.7mm (2.4 x 1.8”) viewable area | 1/8 VGA (greyscale) 62 x 45.7mm (2.4 x 1.8”) viewable area | 1/8 VGA (greyscale) 62 x 45.7mm (2.4 x 1.8”) viewable area | 1/4 VGA AMOLED colour display 57.6 x 43.2mm (2.27 x 1.78”) viewable area Landscape Mode |
| Display Refresh Rate | 25Hz | 25Hz | 25Hz | 120Hz |
| Units (selectable) | mm or inches | mm or inches | mm or inches | mm or inches |
| LED Backlight | on/off/auto | on/off/auto | on/off/auto | on/off/auto |
| Repeatability / Stability Indicator | Yes | Yes | Yes | Yes |
| Battery Save Mode | Auto | Auto | Auto | Auto |
| Measuring range & accuracy depends on material, surface conditions and the transducer selected | ||||
| Minimum Radius for Convex Surfaces | 8.89 mm | |
| Minimum Radius for Concave Surfaces | 76.2 mm | |
| Minimum Headroom | 25.4 mm | |
| Minimum Sample Diameter | 3.8 mm | |
| Minimum Substrate Thickness - F | NA | |
| Minimum Substrate Thickness - NFe | NA |
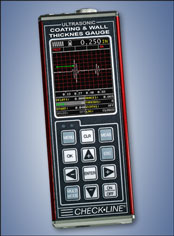 Over sized graphic color LCD is backlit and features easy to read fonts, graphics and display codes showing all critical settings including Velocity, Operating Mode, Alarms, Scan Mode and more. The backlight can be set to ON (always-on), OFF (always-off) or AUTO (automatically-on when measuring).
|
|
||||
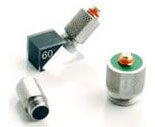
| Description: | Threaded shear wave transducers for quickly interchanging between wedges. Ideal for limited access and curved surfaces. | |||
| Used: | General weld inspection | |||
| Damping: | High gain (G), Resolution(R) *Specify damping after (QC), No damping on 3.5 MHz | |||
| Connectors: | Microdot | |||
| Element Size | 2.25 MHz | 3.5 MHz | 5.0 MHz | 10.0 MHz |
| .250" dia. | QC2525 | - | QC2550 | QC2510 |
| .375" dia. | QC3725 | - | QC3750 | QC3710 |
| .500" dia. | QC5025 | PQC5035 | QC5050 | QC5010 |
|
|
|||
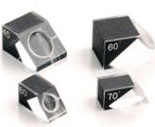
| Quick Change Wedges - Custom angles available on request | |||
| Element Size | .250" DIA. | .375" DIA. | .500" DIA. |
| 45° | QW2545 | QW3745 | QW5045 |
| 60° | QW2560 | QW3760 | QW5060 |
| 70° | QW2570 | QW3770 | QW5070 |
Related Products
CIC-WALL Wall Thickness Gauge Calibration Service
- Easy planning of calibration
- Short turnaround
- Exclusively in accordance with DIN 55 350 Part 18, § 4.2.2, DIN ISO 8402 Part 1
More details
Accessories
TI-SB Ultrasonic Thickness Gauge Accessories
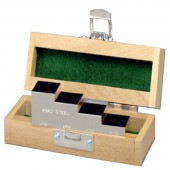
- Precision Machined and Finished
- Includes NIST Report and Test Data
- Includes Wooden Storage Box
More details
TI-SB4 Steel Test Block
- Uncertified Steel Test Block
- For convenient confirmation of thickness gauge calibration
More details
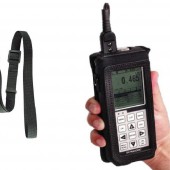
TICC-MVX Instrument Holder for Ultrasonic Gauges
- Constructed from heavy duty Cordura Nylon
- Built-in belt loop
- Includes wrist & shoulder straps
More details
TI-V-BLOCK Transducer Holder
- The V-Block transducer holder offers the operator greater control and repeatabily when measuring on pipes and other curved areas.
For 3/16" & 1/4" Transducers only.
More details
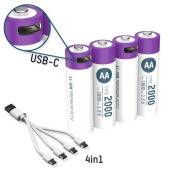
LI-ION Rechargeable AA Batteries
- Li-Ion rechargeable battery
- Stable voltage of 1,5 V over 95% of the runtime
- Charged via the USB to USB-C cable
More details
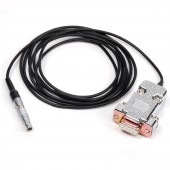
N-306-0010 RS232 Data Cable: Connection for Ultrasonic Gauges
- RS232 (DB-9 to Lemo) Data Cable 182cm
More details
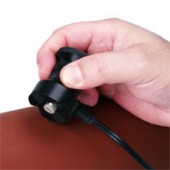
TI-CMX-UW-50 15 m Underwater Probe / Cable Assembly
- 50 Ft. Length, Waterproof Probe/Cable assembly with non-polarized, Dual-Lemo connectors.
- 1/2", 5 MHz Probe for wide variety of steel, stainless steel, aluminum and similar applications.
More details
CIC-WALL Wall Thickness Gauge Calibration Service
- Easy planning of calibration
- Short turnaround
- Exclusively in accordance with DIN 55 350 Part 18, § 4.2.2, DIN ISO 8402 Part 1
- Possibility to adjust and repair
More details
Specifications
| Range in Steel: | Pulse-Echo Mode: Pit and Flaw detection measures from 0.025 - 9.999inches (0.63 to 254 millimeters) Echo-Echo Mode: Thru Paint & coatings measures from 0.1 - 4.0 inches (2.54 to 102 mm). Pulse-Echo-Coating Mode: 0.63 to 254 millimeters & Coating 0.01 to 2.54mm Range will vary +/- depending on the thickness of the coating. |
| Max Coating: | 0.100" |
| Range Coating Only Mode: | 0.013 - 2.540 mm with a resolution of 0.001 mm 0.0005" - 0.1000" with a resolution of 0.0001" |
| Resolution: | 001 inches (0.01mm) |
| Velocity Range: | 0492 to .3936 in./ms 1250 to 9999 meters/sec |
| Units: | Inch or mm |
| Measurement Modes: | - Pulse-Echo (corrosion mode) - Pulse-Echo Coating (Corrosion w/o coating) - Echo-Echo (thru-paint) - Temp Comp (auto adjust for material temp) - Coating Only (Ultrasonic Coating Gauge) |
| Transducer Types: | Dual Element (1 to 10 MHz). |
| Output: | RS-232 for upload/download of setups |
| Memory capacity: | TI-CMX: None TI-CMXDL: over 200.000 measurements |
| Power Source: | Three 1.5V alkaline or 1.2V NiCad AA cells |
| Battery Life: | Typically operates for 150 hours on alkaline and 100 hours on NiCad |
| Auto Power off: | After 5 minutes of non-use |
| Display: | 1/8 in. VGA grayscale display 62 x 45.7mm |
| Keyboard: | Membrane switch with 12 tactile keys |
| Case: | Extruded aluminum body with nickel-plated aluminum end caps (gasket sealed). |
| Temp. Limits | Ambient: -20 to 120° F (-30 to 50° C) Material: -0 to 200° F (-20 to 100° C) Special high temperature probes are optionally available. |
| Weight, net: | 383 grams |
| Dimensions: | 63.5 W x 165 H x 31.5 D mm |
| Warranty: | 2 year limited |
| Certification: | CE Approved, Factory calibration traceable to national standards |
Buy Now
Availability: Available: 1 - 3 days, Delivery time: 1 - 3 weeks, special order request

